
Storm Damage Roofing: What to Do in the First 24 Hours
 When severe wind or hail hits Long Island, NY, the first 24 hours after roof damage set the tone for safety, insurance, and repairs. This guide explains what matters most, what to avoid, and how a licensed roofing contractor can help. If you need immediate guidance on next steps, see our detailed storm damage services to understand how professional emergency response works and how to prioritize safety and documentation.
Why the First 24 Hours Matter in Long Island, NY
Our coastal communities face fast-changing weather. Summer thunderstorms can peel shingles, and fall nor’easters can drive rain under flashing. Winter ice and wind can loosen ridge caps. In neighborhoods from Long Beach and Island Park to Massapequa, Babylon, and Islip, quick action protects your family and your insurance claim. The goal in the first day is simple: stay safe, record the facts, and get a qualified roofing contractor scheduled for professional stabilization and repair.
After a major storm on Long Island, reputable roofers book up quickly. Save time by noting your policy number, taking wide and close photos, and keeping your driveway clear so crews can access your home as soon as conditions are safe.
Safety First: What to Avoid After Roof Storm Damage
Storm scenes can be confusing. It helps to start with what not to do. Your priority is to keep your household away from hazards until a pro can arrive for a controlled assessment.
- Do not enter rooms with sagging ceilings, active leaks through light fixtures, or visible bulges in drywall.
- Avoid any area with downed or low power lines and call your utility immediately.
- Keep children and pets away from debris fields, loose shingles, and broken glass.
- Decline door-to-door offers that pressure you to sign on the spot.
Do not climb your roof, even for a quick look. Surfaces are slick, edges may be loose, and unseen deck damage can give way without warning. Let trained technicians perform exterior assessments with safety gear once the site is stable.
Document Everything for Insurance and Your Contractor
Clear records help your carrier and your roofing contractor understand the event and verify scope. Take photos and short videos that show time, date, and conditions if possible. Capture both the full scene and details.
- Exterior: missing shingles, lifted flashing, dented vents, damaged gutters, and debris patterns.
- Interior: water stains, bubbled paint, ceiling cracks, and damp insulation that is safely visible without disturbing finishes.
- Ground level: fallen limbs, shingles on lawns in places like Commack, Smithtown, or Huntington, and any blown-off materials.
Keep a simple timeline: when the storm started, when you discovered damage, and any protective steps you took inside the home that did not involve roof access. Save receipts for emergency items, maintain a list of rooms affected, and store your files in a cloud folder you can share with your adjuster and contractor.
Temporary Leak Control Without Risk
Temporary leak control is important, but it must be safe and simple. Focus on what you can do without tools or ladders. Place furnishings and electronics out of affected areas, use floor protection to prevent slips, and isolate wet rooms by closing doors. If water is dripping from a light fixture or breaker panel, keep clear and contact the utility or a licensed electrician. Professional crews handle roof tarping and exterior stabilization once weather and site conditions allow. Keep clear of downed lines and do not attempt makeshift repairs from windows or balconies.
How a Licensed Roofing Contractor Assesses Storm Damage
A qualified roofing contractor begins with safety controls, then a structured inspection. On Long Island homes, they look for wind-lifted shingles along eaves, ridge caps loosened by gusts off the bay, flashing separation around chimneys common in older housing stock, and impact marks from wind-borne debris. In attics, they check for daylight at roof penetrations and moisture at sheathing seams. Findings are documented with photos that align with what adjusters expect to see, helping streamline claim decisions.
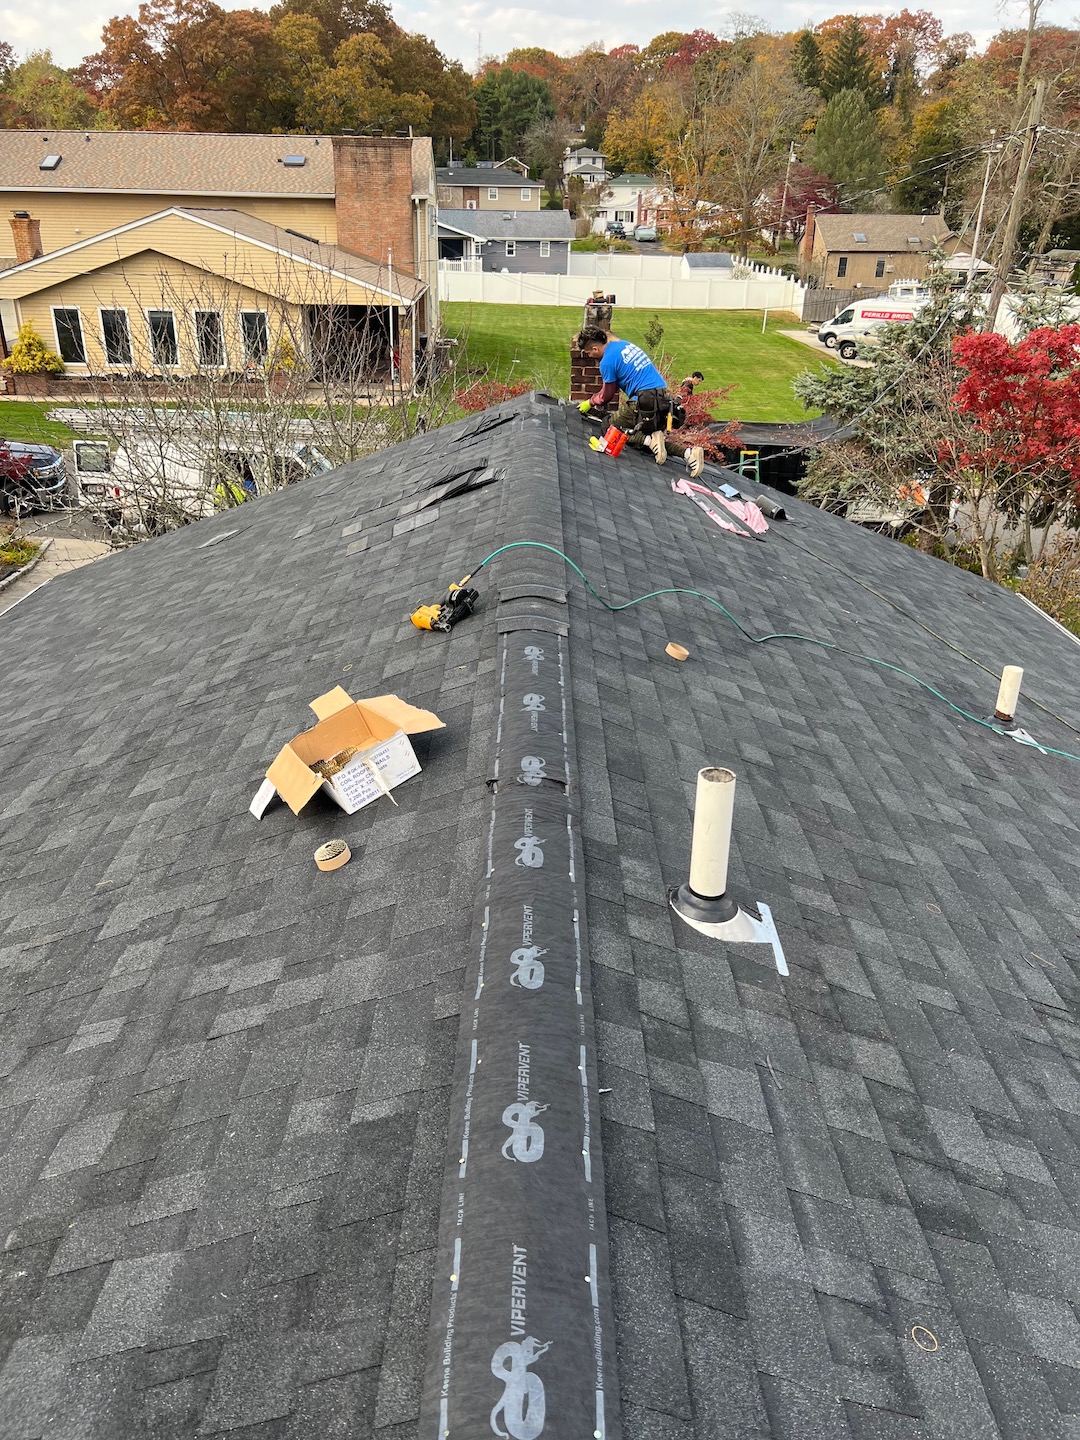
Your contractor will also determine if emergency dry-in is required. Tarping or temporary sealing is done by trained crews using proper fall protection and materials suited to current weather. The priority is to stop active intrusion, then return to complete permanent repairs with matching materials once approvals and schedules are set.
Coordinating With Your Insurer in New York
Most carriers request quick notice after a loss event. When you report, have your policy number, the date and time of the storm, and a short description of what you observed. You can share your photo set and contractor findings once available. Ask how the carrier prefers to handle site access for adjusters. Many homeowners authorize their roofing contractor to meet the adjuster onsite, which helps align on scope. While processes vary by carrier, reliable documentation and professional assessments usually speed things along.
Be cautious about anyone promising guaranteed claim outcomes. A contractor’s role is to provide detailed, accurate information and perform approved work to code and manufacturer standards. Your carrier decides coverage and terms based on the policy and the evidence presented.
Getting Ready for Emergency Service on Long Island
Preparation helps crews move faster when they arrive from places like Hempstead, Oyster Bay, or Brookhaven. Clear driveway access if safe, relocate vehicles from under tree limbs, and secure pets. Gather your claim number and previous roof records if you have them. If a second round of storms is forecast, your contractor will plan stabilization around the weather window. You can read about the typical emergency workflow on our storm response page and see how scheduling, assessment, and dry-in are coordinated.
Common Local Storm Patterns and Roof Vulnerabilities
Long Island roofs take a unique blend of wind, salt air, and seasonal temperature swings. Wind-driven rain can push under shingles at valleys, especially on older roofs near the shore. In inland towns such as Hauppauge, Melville, and Garden City, tall trees may increase limb strikes and gutter clogging that worsens overflow. Freeze-thaw cycles can widen small openings at flashing and fasteners. Your contractor will look across the system, not just at visible shingle loss, to ensure vents, ridges, valleys, gutters, and penetrations are sound.
Material and age matter too. Architectural shingles tend to resist moderate gusts better than older three-tab styles when properly installed, but even newer roofs can suffer when gusts align with roof pitch and orientation. The inspection will match what the storm delivered with how your system responded, then propose appropriate permanent repairs.
What to Expect From Magnum Contracting Group During a Storm Response
When you reach out, our team confirms basic safety details, weather status, and access. We dispatch as soon as conditions and routes are safe. On arrival, we perform a site safety check, document damage, and, if needed, install professional-grade temporary protection. Next, we review your photos, share ours, and coordinate with your insurer per their process. We aim to communicate clearly so you know what comes next and when.
After stabilization, we prepare a plan for permanent repairs based on manufacturer specifications and local building practices. That plan focuses on restoring your roof to reliable performance, including attention to flashing, underlayment, ventilation, and fastener patterns. Our crews serve homeowners across Nassau and Suffolk, from Freeport and Merrick to Smithtown and Port Jefferson, with scheduling that prioritizes active leaks and vulnerable areas.
Choosing the Right Roofing Contractor After a Storm
Look for proper licensing, local references, and a track record of storm work in communities like Massapequa, Huntington, and Bay Shore. Ask about response procedures, materials, and how documentation is handled with adjusters. A reputable contractor will provide clear communication, written scopes, and installation aligned with manufacturer guidelines. Avoid high-pressure tactics and verify business identity before signing.
It also helps to work with a company that understands Long Island weather patterns and common roof assemblies in our neighborhoods. That local experience speeds assessments and helps you avoid repeat issues in the next storm cycle.
Key Steps You Can Take Without Getting on the Roof
There are practical actions that support a safe, efficient response while you wait for help. None require tools, ladders, or roof access.
- Protect walkways with towels or mats if water is tracking across floors.
- Move valuables away from known drip points and place them on higher shelves.
- Shut doors to damp rooms and use fans only in dry areas to avoid spreading moisture.
- Keep a simple log of observations and timestamps you can share later.
These steps keep your family safe and give your contractor and insurer a clearer picture of the situation without risking injury or worsening damage. If anything feels unsafe, step back and wait for professionals to arrive. Avoid paying cash upfront to door-to-door crews; instead, confirm credentials and written details before authorizing work.
Understanding Documentation, Temporary Protection, and Emergency Prep
Homeowners often hear three phrases after a storm: documentation, temporary leak control, and emergency service prep. Documentation is your record of what happened, when, and where, supported by photos and notes. Temporary leak control is professional dry-in work your contractor performs to stop active intrusion. Emergency service prep means gathering your information, clearing safe access, and being ready to coordinate with your carrier.
If you want broader context on roofing terms and why certain steps come first, our storm damage roofing overview provides a plain-language starting point. It explains how priorities shift as weather changes over the first 24 to 72 hours and why timing affects the sequence of tasks.
When to Call and What to Say
Call as soon as you notice roof-related damage. Share your address, any visible hazards, rooms affected, and whether power is stable. Note if you hear dripping or see new stains expanding. The more specific you are, the better your dispatcher can route the right crew and equipment. If the forecast shows more rain, mention it so your contractor can plan for stabilization within the safest weather window.
Need reliable storm damage roofing help in Long Island? Call Magnum Contracting Group today. For fast assistance, reach our team at 516-277-2300 and have your policy number handy if you plan to open a claim.
Next Steps You Can Expect After the First Day
After emergency stabilization, your contractor will outline permanent repair recommendations and timing. You will review documentation together and confirm materials that match your existing roof. If your carrier requires additional photos or a joint inspection, your contractor can coordinate availability. When approvals are in place, work is scheduled, and crews return to complete repairs with attention to flashing, underlayment, and ventilation so the whole system is ready for the next line of storms.
If you want to see how professional storm response is structured from first call to final inspection, browse our overview of storm damage help and learn how scheduling, safety, and documentation come together to protect your home.
Keep an eye on changing conditions and stay clear of any new leaks or ceiling movement. If conditions worsen, call us again so we can reassess and adjust the plan.